Showing posts with label recycling. Show all posts

Monday, November 28, 2011

Leaving the Leaves

Did you know that there's a campaign underway to get us to stop raking up our leaves?  Rather, we're being encouraged to grind them into a finer mulch, or even just leave them where they are.  Ground up leaves that are mulched by a lawnmower are quicker to break down. They do wonders for the soil, adding organic matter, and helping replace what's lost through erosion. When left in garden beds, they protect roots and help retain moisture.

If enough people comply, municipalities will spend less time collecting and processing leaves, which saves them money.  See the video below that features Ann Holmes from the Greenburgh Nature Center in Westchester County.


With more than 50 trees on our property, the leaves piled up fast.  You can see that where the lawn ends, and the tree line begins, the leaves are at least a foot deep.

Here are some things I'm trying with my leaves this year...

The leaves are not being raked out of the beds until spring.  They're being left in place to protect the plants from winter abuse. 
They're just being left on the floor of the wooded areas.

We've created a pile behind the compost bin that we'll use to "feed" the compost throughout the year.  After food scraps or grass clippings are added to the bin, we'll throw in a few handfuls of leaves for good measure. 

The leaves on the lawn are being mowed over and ground up, then collected to be worked into the vegetable beds.


They're also being used in combination with wood shavings as litter in the chicken coops.  I think I'll try to use the ground up ones here in the future.


What do you do with your leaves?

Saturday, May 28, 2011

Cathedral of Junk


In an effort to comply with the “Keep Austin Weird” motto, we visited the Cathedral of Junk there – appropriately enough, on Easter Sunday. It rises, almost imperceptively from the street, from Vince Hanneman’s quiet backyard in a suburban neighborhood. Plants are creatively integrated.


Vince has been collecting stuff since the 1980s and has faced city ordinance violations and irate neighbors, but has managed to expand and maintain this crazy 80-ton structure, including it’s stained glass windows,


collections,
color themes,

inexplicable juxtapositions,

child-friendly climbability (hellooooo up there!)

and wabi-sabi strangeness.

The cathedral is open during daylight hours most days.

Come worship at the holy throne.


And leave your mark on the holy surfboard.

Apologies to my blogging friends that I haven't visited in weeks...my biggest work deadline of the year is looming! See you in June, if not before.

Sunday, April 10, 2011

Flower Show Recap

Don't you love the color of these orchids?
The Garden Club of Nyack held it's 18th annual Flower Show on Saturday.  Both adult and child gardeners were able to enter in several horticulture and design categories, and for the first time this year, there was a photography division.  Last year, I really enjoyed clerking for Jeanne, who was the chief judge for the design division. This year, I clerked for the children's judges Joanne and Celia.  I also served as an entry clerk for both the children and adult divisions, helping the exhibitors categorize and display their entries. (I even worked up the courage to submit a few entries of my own this year - and have included them in this post.)

There were so many outstanding submissions this year - it was hard to pick a few favorites, and I was limited by a dead camera battery that forced me to take most of these photos on my phone.

The "invitational" category, which is unique every year, asked that the exhibitors create a place setting for a celebration.  I liked the more formal entries best- this one celebrating spring, and another for a garden wedding.  

There were lots of great entries in the children's divison.  Classrooms at Upper Nyack school, and my group of afterschool gardeners at Valley Cottage were among the groups submitting.

This was the entry from our class -- it won second place!

This class had their seeds "race" to the finish line!

More entries from the kindergarten classes.


I loved this pasta herb garden, planted in a colander, and mulched with real pasta!

This gorgeous and heartfelt tribute to a gardener who passed away won "Best in Show" in the children's  category. 
This colorful flower cart won the People's Choice award in the children's division.

Here's one of the recycled soda bottle planters we did in our afterschool gardening class.  The idea for this project came from Mike Lieberman's Urban Organic Gardener site.  It won a second place!

Another one of our group submissions, a gourd grown from seed in our school greenhouse, placed first. 


Richard's tribute to the people of Japan won "Best in Show" for the Adult Horticulture Division.  It was accented with handmade origami cranes.

Here's my little dish garden, which was inspired by my facebook friend Helen Yoest, who has been posting photos of some amazing creations from Moss and Stone Gardens. 
Unfortunately the handles prevented this from qualifying in the the miniature category, so it went into a separate division called "other plant designs," and won a second place.  (I also learned that some varieties of moss are endangered in New York State, and because of this, moss may not be allowed in future shows.) 

A spectacular succulent that we had some trouble identifying. 


Here's an unusual and creative egg arrangement that won a first in the miniature category.  I love the way edibles, including chili pepper and asparagus, were used in this arrangement.


I tried to duplicate last year's daffodil bouquet, but not all of the varieties I used then were in bloom yet, so I supplemented with pussy willow and forsythia.

It got a first place in the forced branches category.

Isn't this an amazing Christmas Cactus in bloom?  It comes from the owner of one of our favorite restaurants, the Golden Mushroom.


There was a good turnout for the photos.   I entered a photo of an allium in the first stages of bloom, and got an honorable mention.  Congrats to Phoebe Farrell, who took home a first place ribbon for her tulip photo in the children's photo division!


Don't miss the Garden Club of Nyack's plant sale on May 22!
Tuesday, March 1, 2011

Starting Seeds


After a winter of frozen fingers, I’m looking forward to getting my hands dirty again, and the great, gushing Northeast thaw finally seems to be happening.  Most of the materials for starting seeds can be found around the house  - the only thing I needed to buy is  seed starting mix.  Why use seed starting mix instead of potting soil?  It retains water better and is easier for roots to penetrate.  It’s free of weed seeds and fungal spores and has a smoother texture. It usually contains a mixture of peat moss, vermiculite and perlite.

One day I’d like to invest in one of these cool gadgets that Hook Mountain Growers is using to make soil blocks.  For now, I’m using  recycled materials like yogurt cups, nursery flats and pots, poking  a hole for drainage in the yogurt cups.  I always wash recycled pots well to remove traces of fungus, even run them thru the dishwasher on sani-cycle.   

In the past I’ve also used peat pots and paper towel rolls for seed starting.  These pots have the advantage of  having the ability to be planted directly outside without disturbing the seedling roots, so they may be a better option for plants that don’t like to have their roots disturbed, like cucumbers.   However, my schedule doesn’t always allow me to check on my plants every day – especially if they’re in the school greenhouse.  I’ve found that they dry out quickly and didn’t always break down quickly enough once planted for the roots of less aggressive plants to penetrate.  In fact, I’ve extracted these pots completely intact from soil at the end of the summer.  Much depends on the location, irrigation and type of soil. 

Once the seed starting mix is moistened with water and the cups are filled, I use a pencil to create a seed hole, then spray with water. The more delicate the stream of water, the less possibility there is of disturbing the seed.  In the school greenhouse, we also underwater by placing the pots in trays and filling the tray with water.  The water seeps into the bottom of the pot and encourages the roots to grow down seeking the moisture source.

Covering with plastic or a lid of some kind until the seeds sprout is helpful.   I've tried starting the seeds at home near a sunny window and in my closet under flourescent lights, but the greenhouse gets the best results, and I try to move most of my seedlings there once they've sprouted.   The constant temp there of 70-75 is preferred, and air circulation is also helpful in preventing fungal growth. 

Once the seedlings are bigger, they're hardened off by being exposed gradually to lower temps and sun outside. 

So far I’ve started onion, cherry tomato, pepper, sugar snap pea, cleome, cardinal vine, black eyed susan vine, sweet william, sweet pea, and lunaria. 

On Friday, our afterschool enrichment class will be starting seeds in the school greenhouse.  We have 16 students this time, ages K-5th grade.

Are you starting any seeds early this year?


Sunday, November 14, 2010

How to Make a Toad House

You can make a toad house out of an old or broken flowerpot.  Dig a hole about twice the size of the pot.  Turn it on its side.  Add a bed of leaves. 

Make sure you label it, so people who come across it know what it is.  Use permanent marker so that it doesn’t get washed off in the rain. 

You can decorate it .

Add rocks.

For a luxury touch, add fluff from a cattail.  


Other treats?


You might add a dish of water for the toad or frog to spash around in.

These were made by our afterschool gardening class.  This, and lots of other great projects designed to attract wildife to your garden, are in this book.


Frogs and toads become scarce when the weather gets cold.  What kind of critters do you find in your backyard this time of year?  

Wednesday, March 31, 2010

Gardening With Kids: Ten Things That Work

It's not quite an "Edible Schoolyard" yet, but we're so lucky that our elementary school has an enclosed courtyard garden, greenhouse, pond and outdoor classroom space. For the past few years, I’ve been on the committee that helps maintain the courtyard, assists classes with planting projects, and teaches a gardening enrichment class after school.  We've found that some things work better than others.  I'd love to hear your tips, too!

1) Mass sowing.
Nothing is worse than coming back to school after a weekend away to see that all the seeds have sprouted in their individual pots except for little Isabelle’s. Don’t be afraid to sow extra seeds in each pot –they can always be thinned later. And just to be safe, plant a few extra pots. You may want to wait to have kids decorate or label them with their names until you know for sure that everyone has a plant to mark.
2) Big seeds.
When planting with a big group of kids, it’s much easier and less time consuming to dole out big seeds. With the tiny ones, they’re easier to drop, and easier to lose. That means sooner or later someone will be saying “He got three seeds and I only got two!” Then everyone with two will want three and you spend half the period handing out seeds. Stick to big seeds and give everyone the same number.

3) Teachers getting dirty.
Not all teachers are experienced or enthusiastic gardeners, but those who get out there and get their hands dirty with the kids send a powerful message: that they’re willing to try something new, experience the ups and downs along with their class, and share in their victories.

4) Worms.
Kids who have no interest in growing plants suddenly become totally engaged when worms are involved. A bucket of worms never fails to attract an audience – even if they’re all saying “Eeeewwwwww….”

5) Hand to mouth.

It’s wonderful to see kids eating fresh vegetables that they’ve grown themselves. One way to encourage this is to plant crops that they can harvest and eat right away – no cutting, no cooking. If you’re growing organic maybe you can get away without washing them. My favorite crops to do this with are berries, sugar snap peas, lettuce, cherry tomatoes, asparagus and figs. You can bring a bucket of water for rinsing on the spot, and try radishes and carrots, too. Why not nibble an edible flower, like a marigold or pansy while you’re at it?


6) Recyclables – Our kids had a great time discovering that cilantro can be grown in a familiar yogurt container, nasturtium takes the place of roast chicken, morning glories are living in old juice bottles.

Here’s a link to a project we did last year: starting seeds in old toilet paper rolls.

7) Fast crops.
Just like a watched pot never boils, a watched seed never sprouts. When kids are eagerly waiting to see some green leaves, the quicker they appear, the better. And if you’re gardening in a cold climate like we are, it’s nice to have something that can be harvested before school lets out in late June. Micro-greens and radishes can be harvested in as little as three weeks.  Check out  Wisconsin Fast Plants for ideas and kits.

8) Teepees.
From setting up the poles to planting the seeds, to trellising, kids love creating plant “houses” that they can stand in. Pole beans and morning glories are good plants for teepees.

9) Teenagers.
Over the winter we had some teenagers from our high school’s botany class come over and help our 3rd graders plant. Haven’t you heard? Teenagers are cool, and so is anything they do.


10) Sesame Street
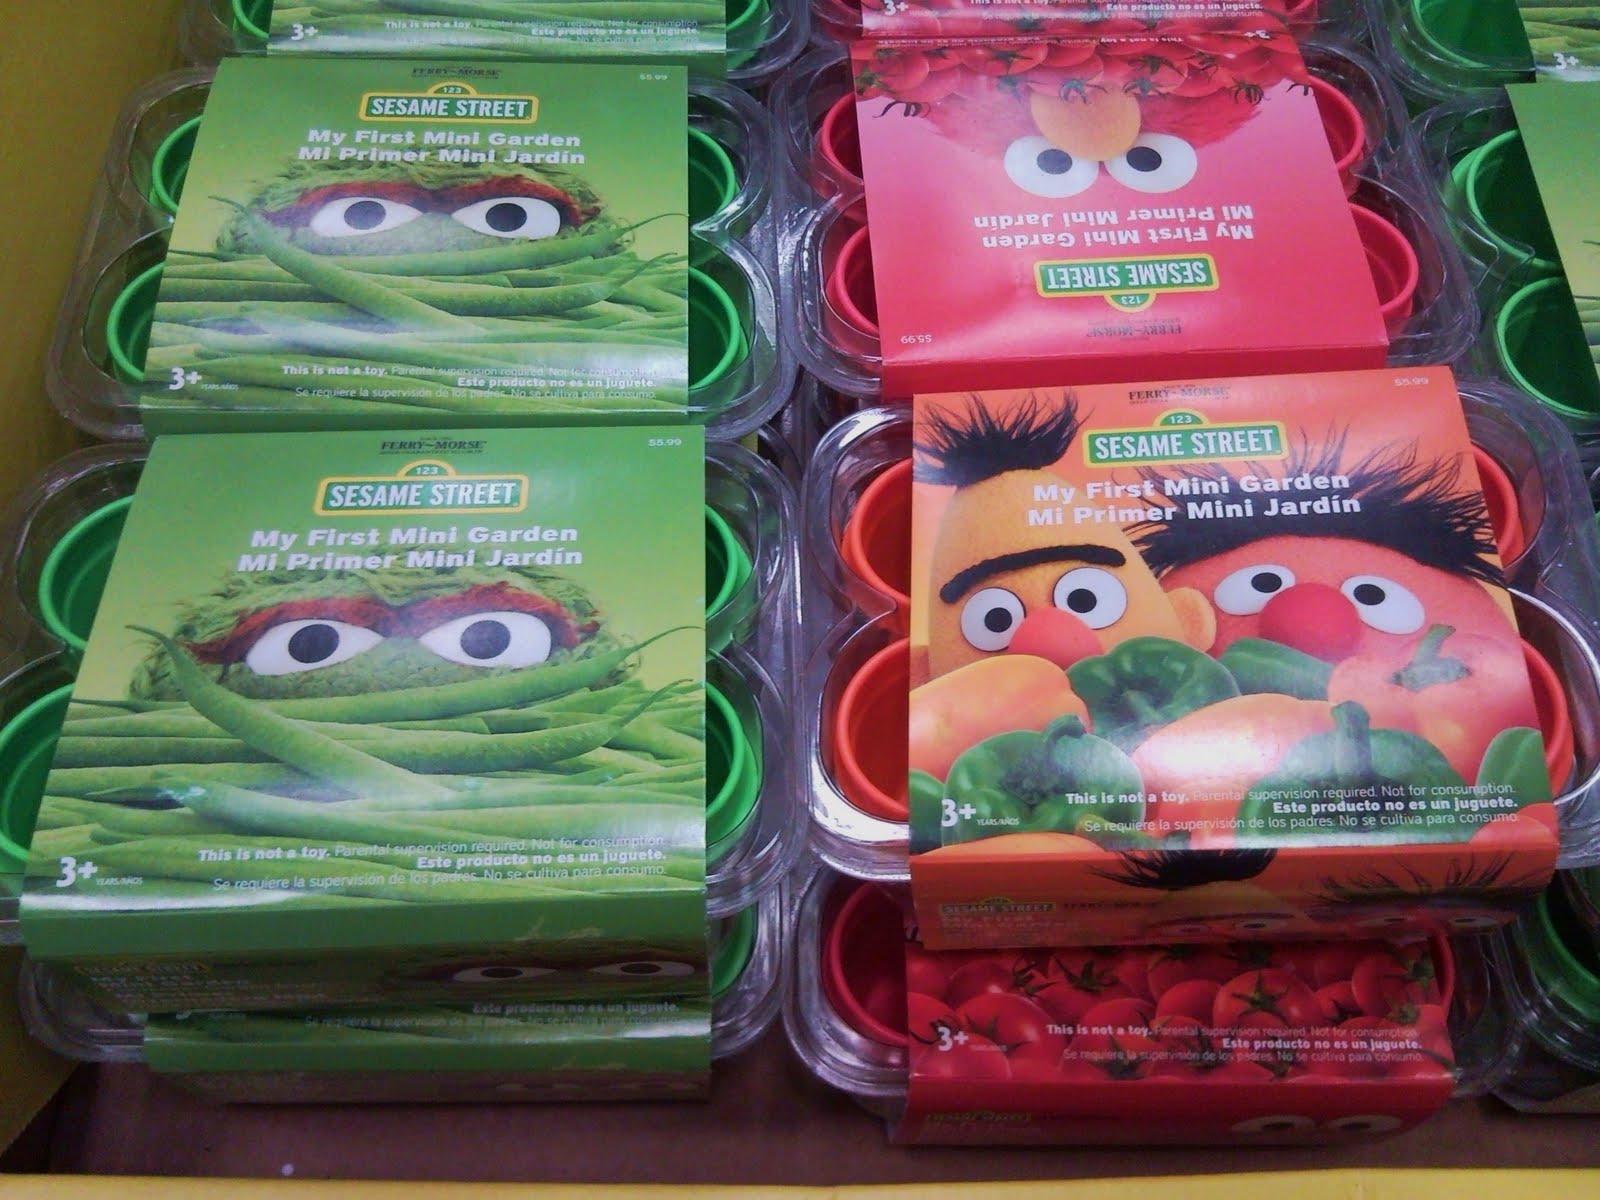
Ask Michelle Obama - she did a guest spot on the show to talk about gardening.  I saw these yesterday in Lowes - I have to confess I haven’t used them. But if I had a preschooler, it’s a safe bet that I’d be buying some.


What works for you when gardening with kids?